The Home Assistant Voice PE is already an excellent private and local voice assistant, but today, we’re taking it to the next level. By integrating ChatGPT with Home Assistant, we’ll bring advanced conversational AI capabilities to the Voice PE, making it smarter, more interactive, and even more powerful. So, let’s dive in and get started!
Table of Contents
So what’s needed?
To set up ChatGPT with Home Assistant, you’ll need to obtain an API key from OpenAI. This service is not free, so you’ll need to set up a payment method when you create an account.
I personally haven’t been using this service for long so I can’t provide an estimate on how much it could cost in average. It also depends heavily on how often and in what way you use it. We will go over a few things to limit the usage so we can minimize the cost.
Setting up an OpenAI account
To get started with OpenAI, visit platform.openai.com and click Sign Up to create an account. Once your account is set up, you’ll need to add a payment method by navigating to Settings > Billing > Payment Methods. Next, under the Overview section, add a balance to your account to start using the API key.
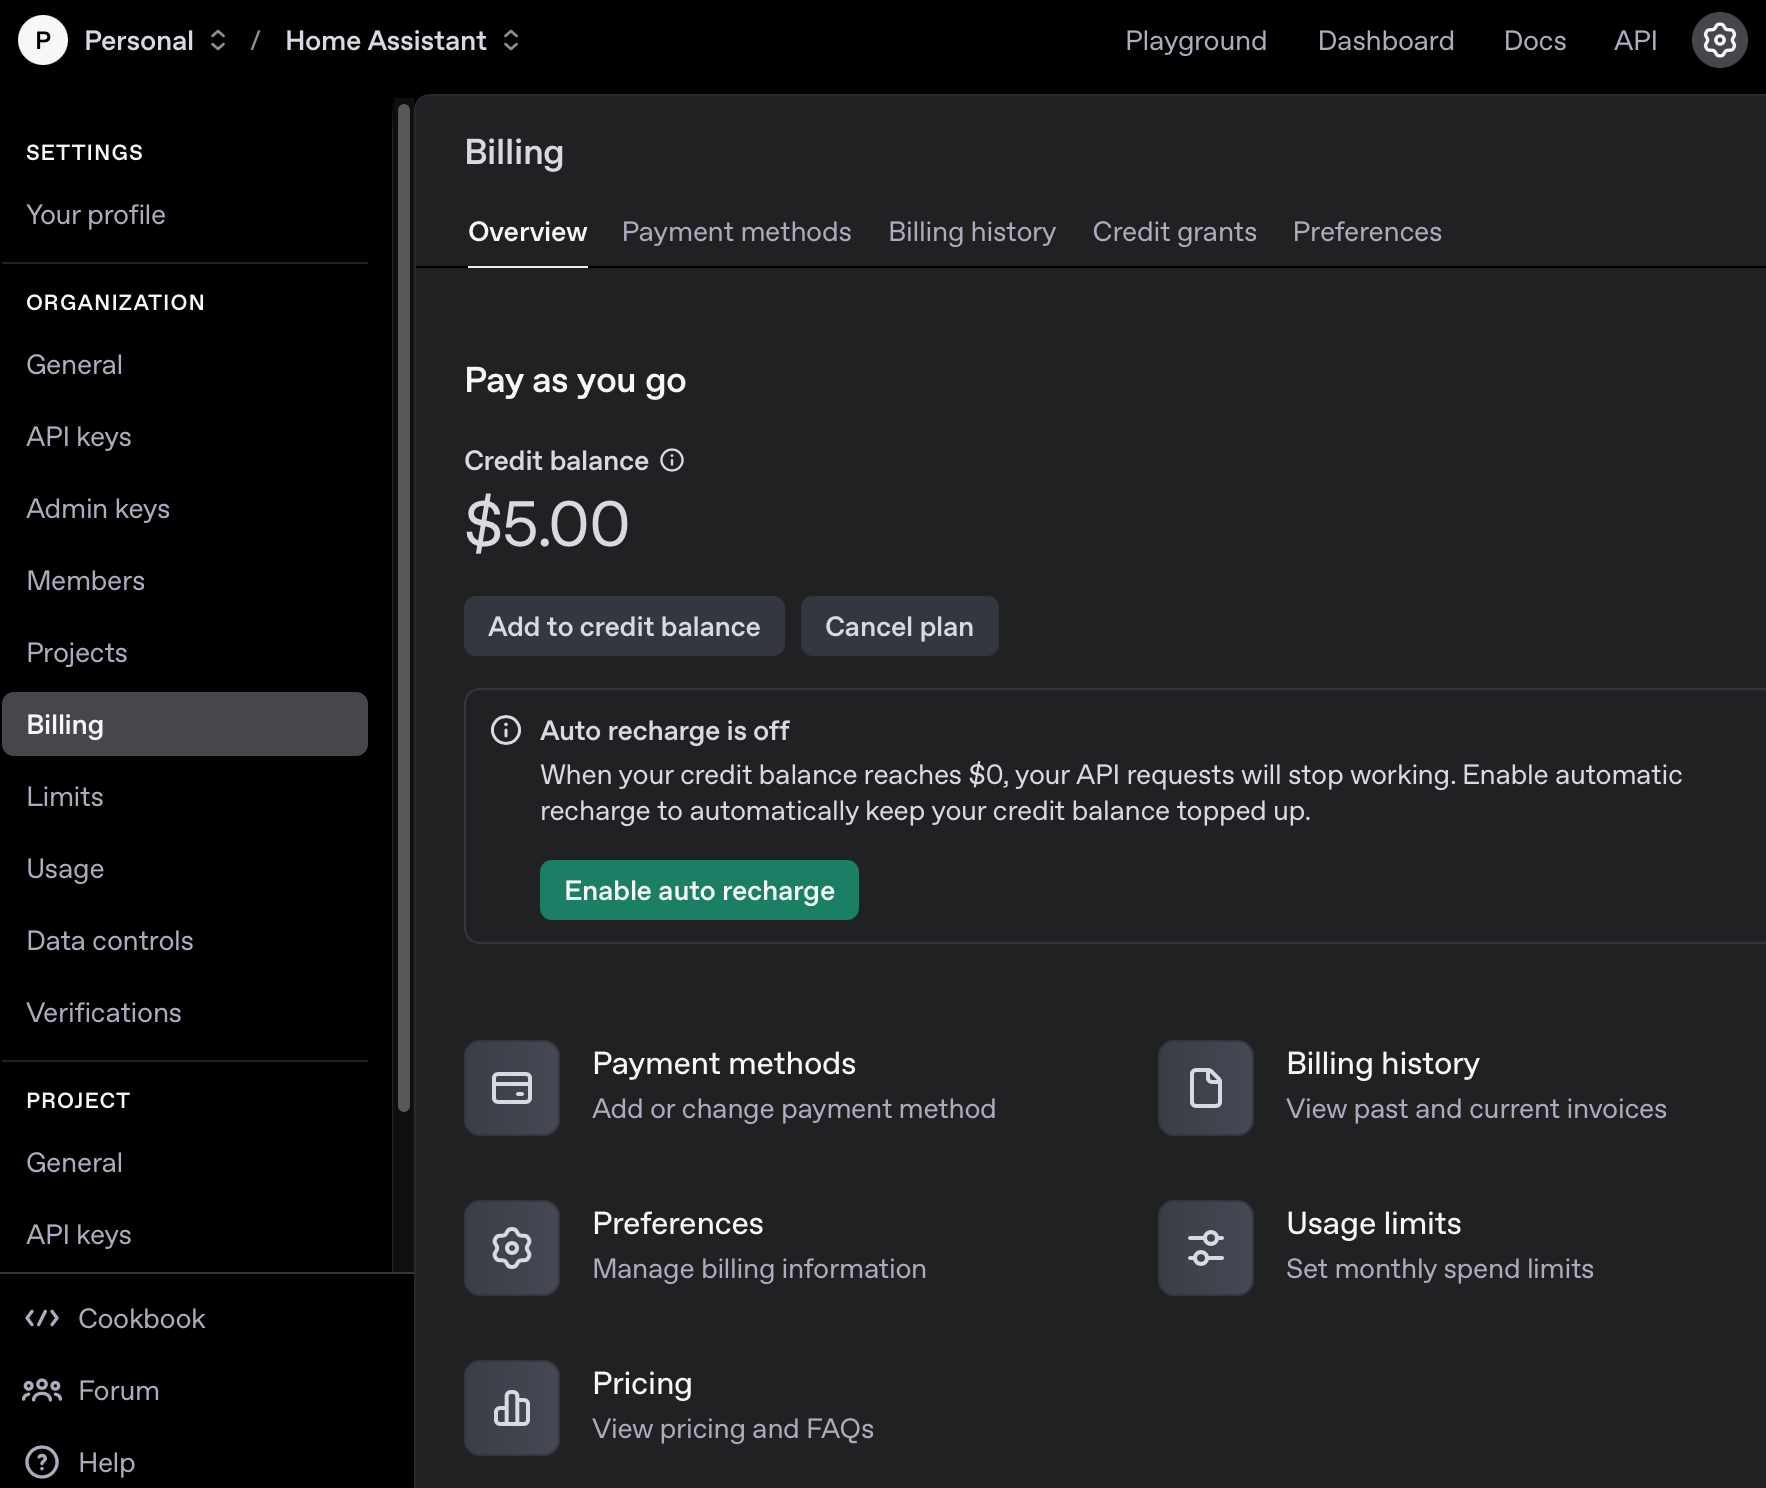
Managing costs and setting limits
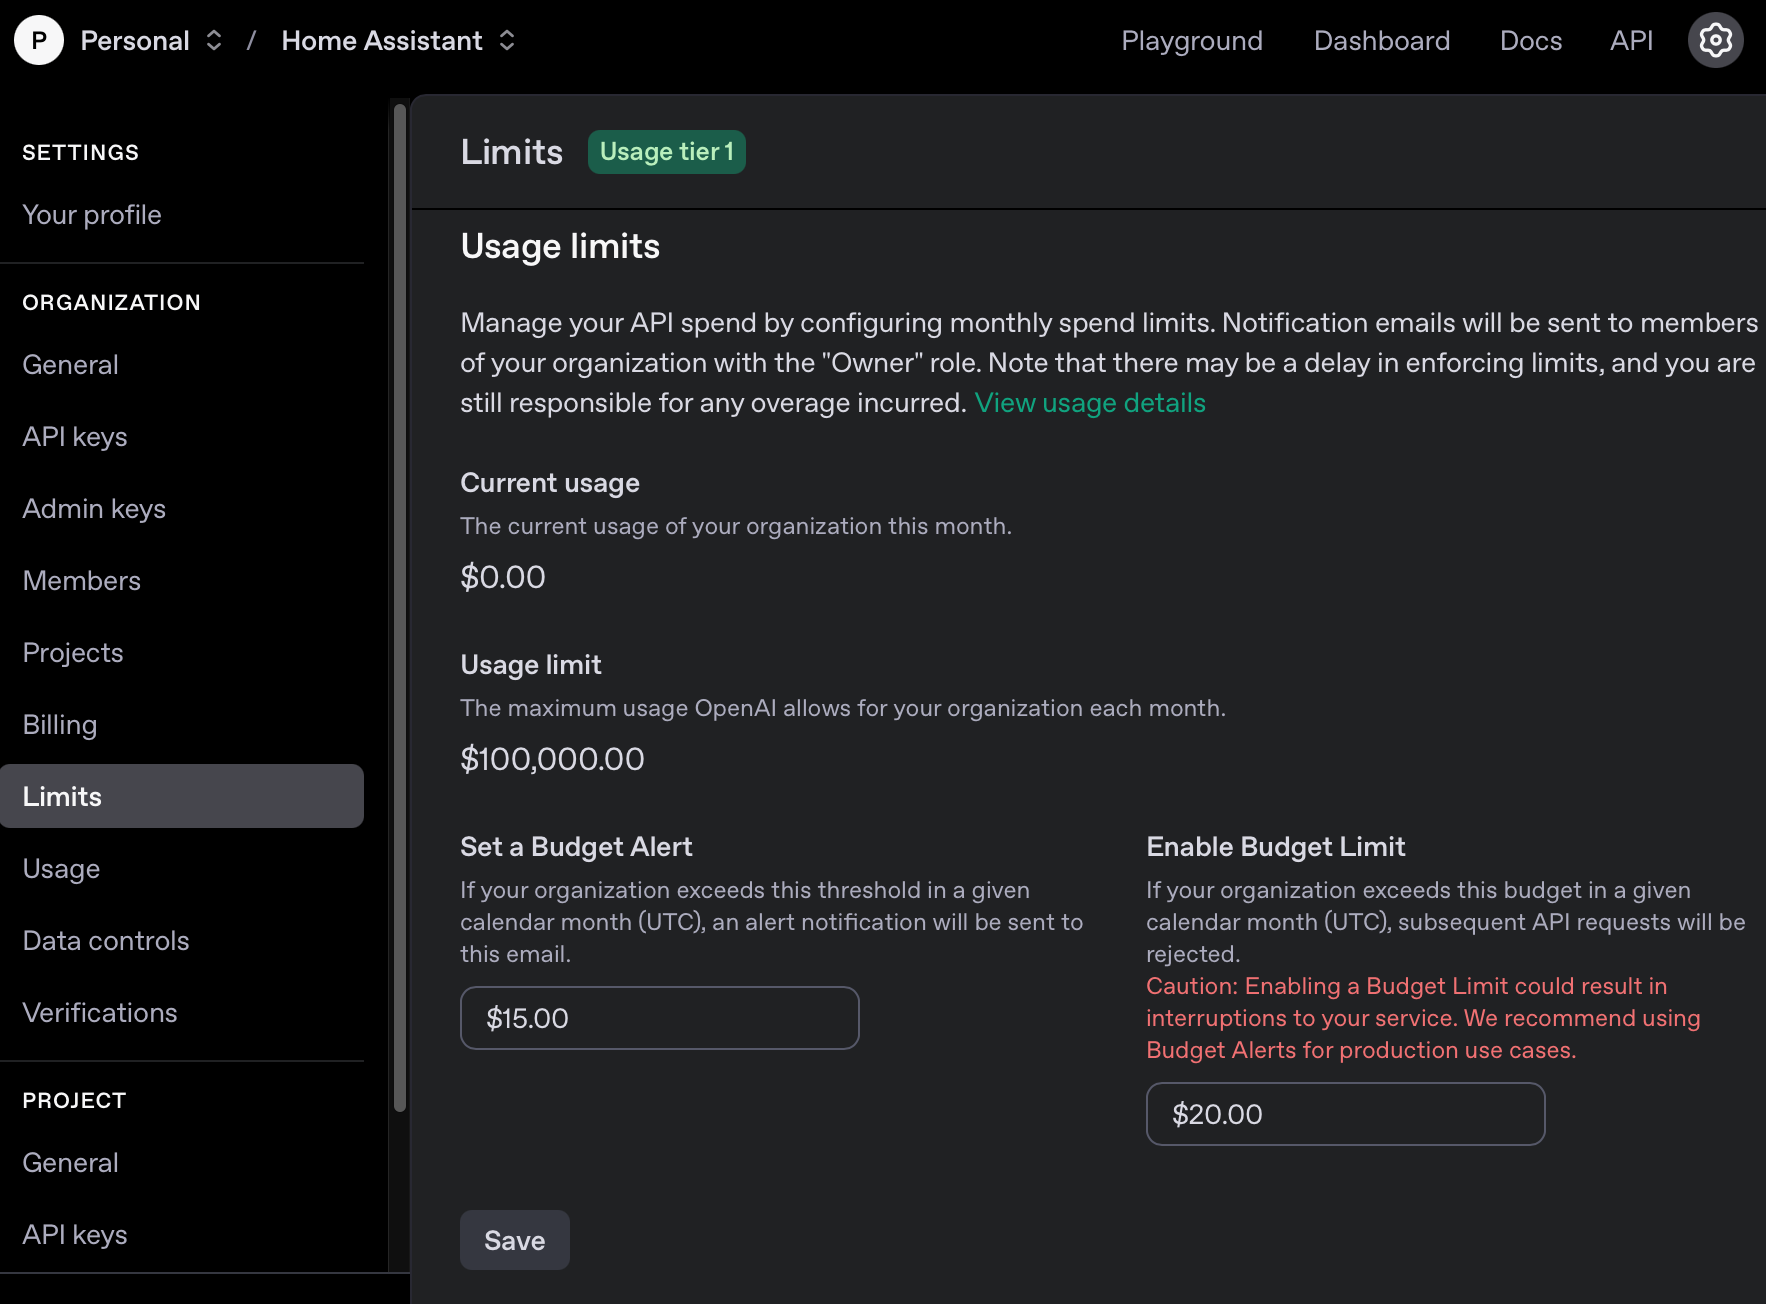
If you enable auto-recharge, consider enabling usage limits to prevent unexpected charges. So, go to the Limits section, enable Budget Limit, and specify the maximum amount you want to spend per month. Once this limit is reached, any new API requests will be rejected until the next billing cycle. You can also configure Budget Alerts to receive email notifications when your usage surpasses a specified threshold.
Monitoring API usage
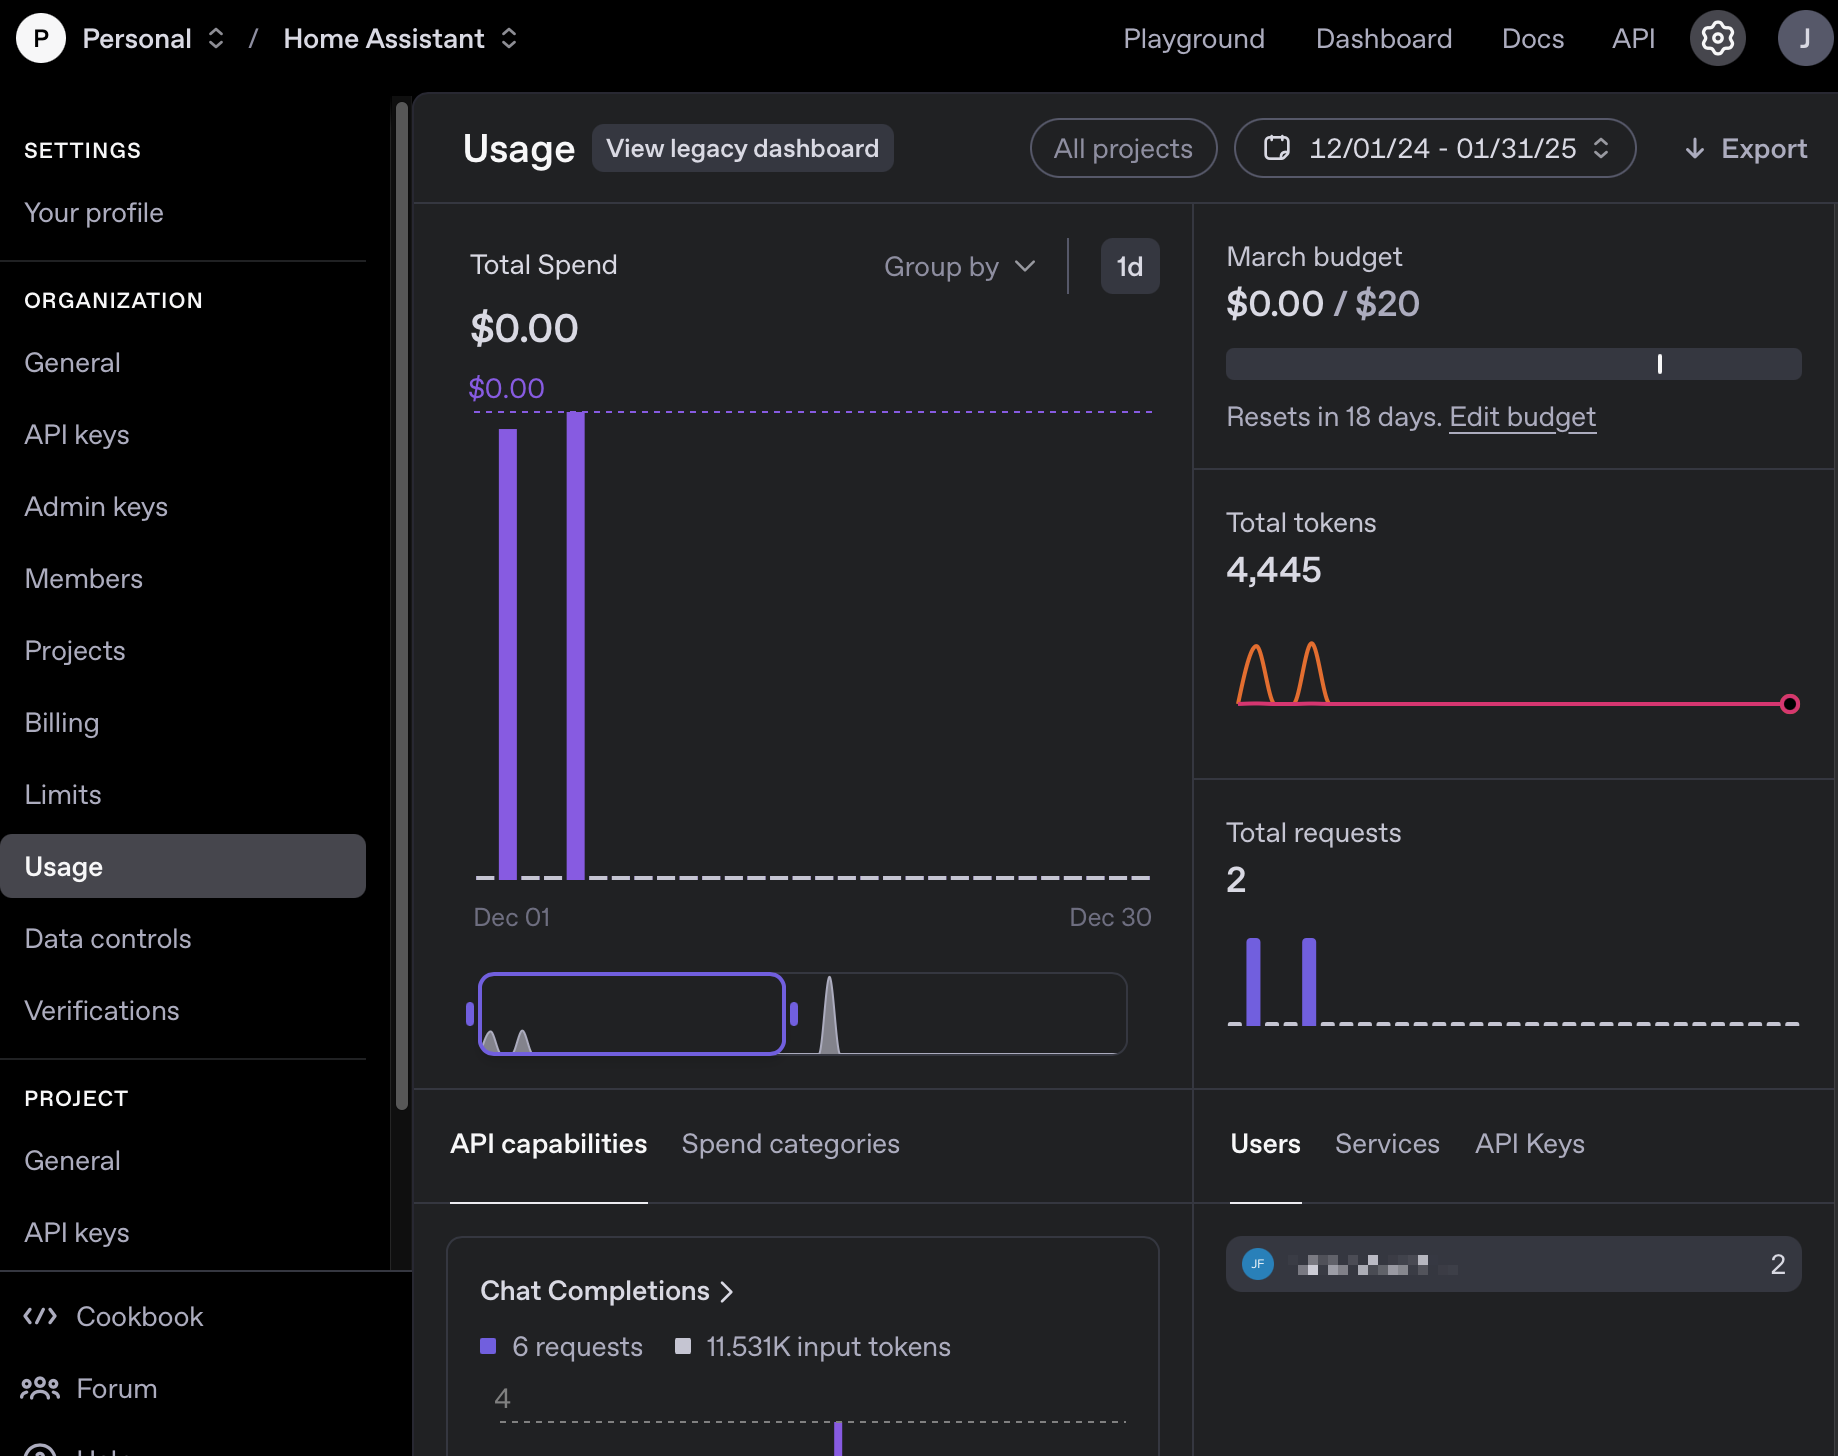
To keep track of your API activity and associated costs, visit the Usage section. Here, you can access detailed reports on your API consumption, helping you manage your expenses efficiently.
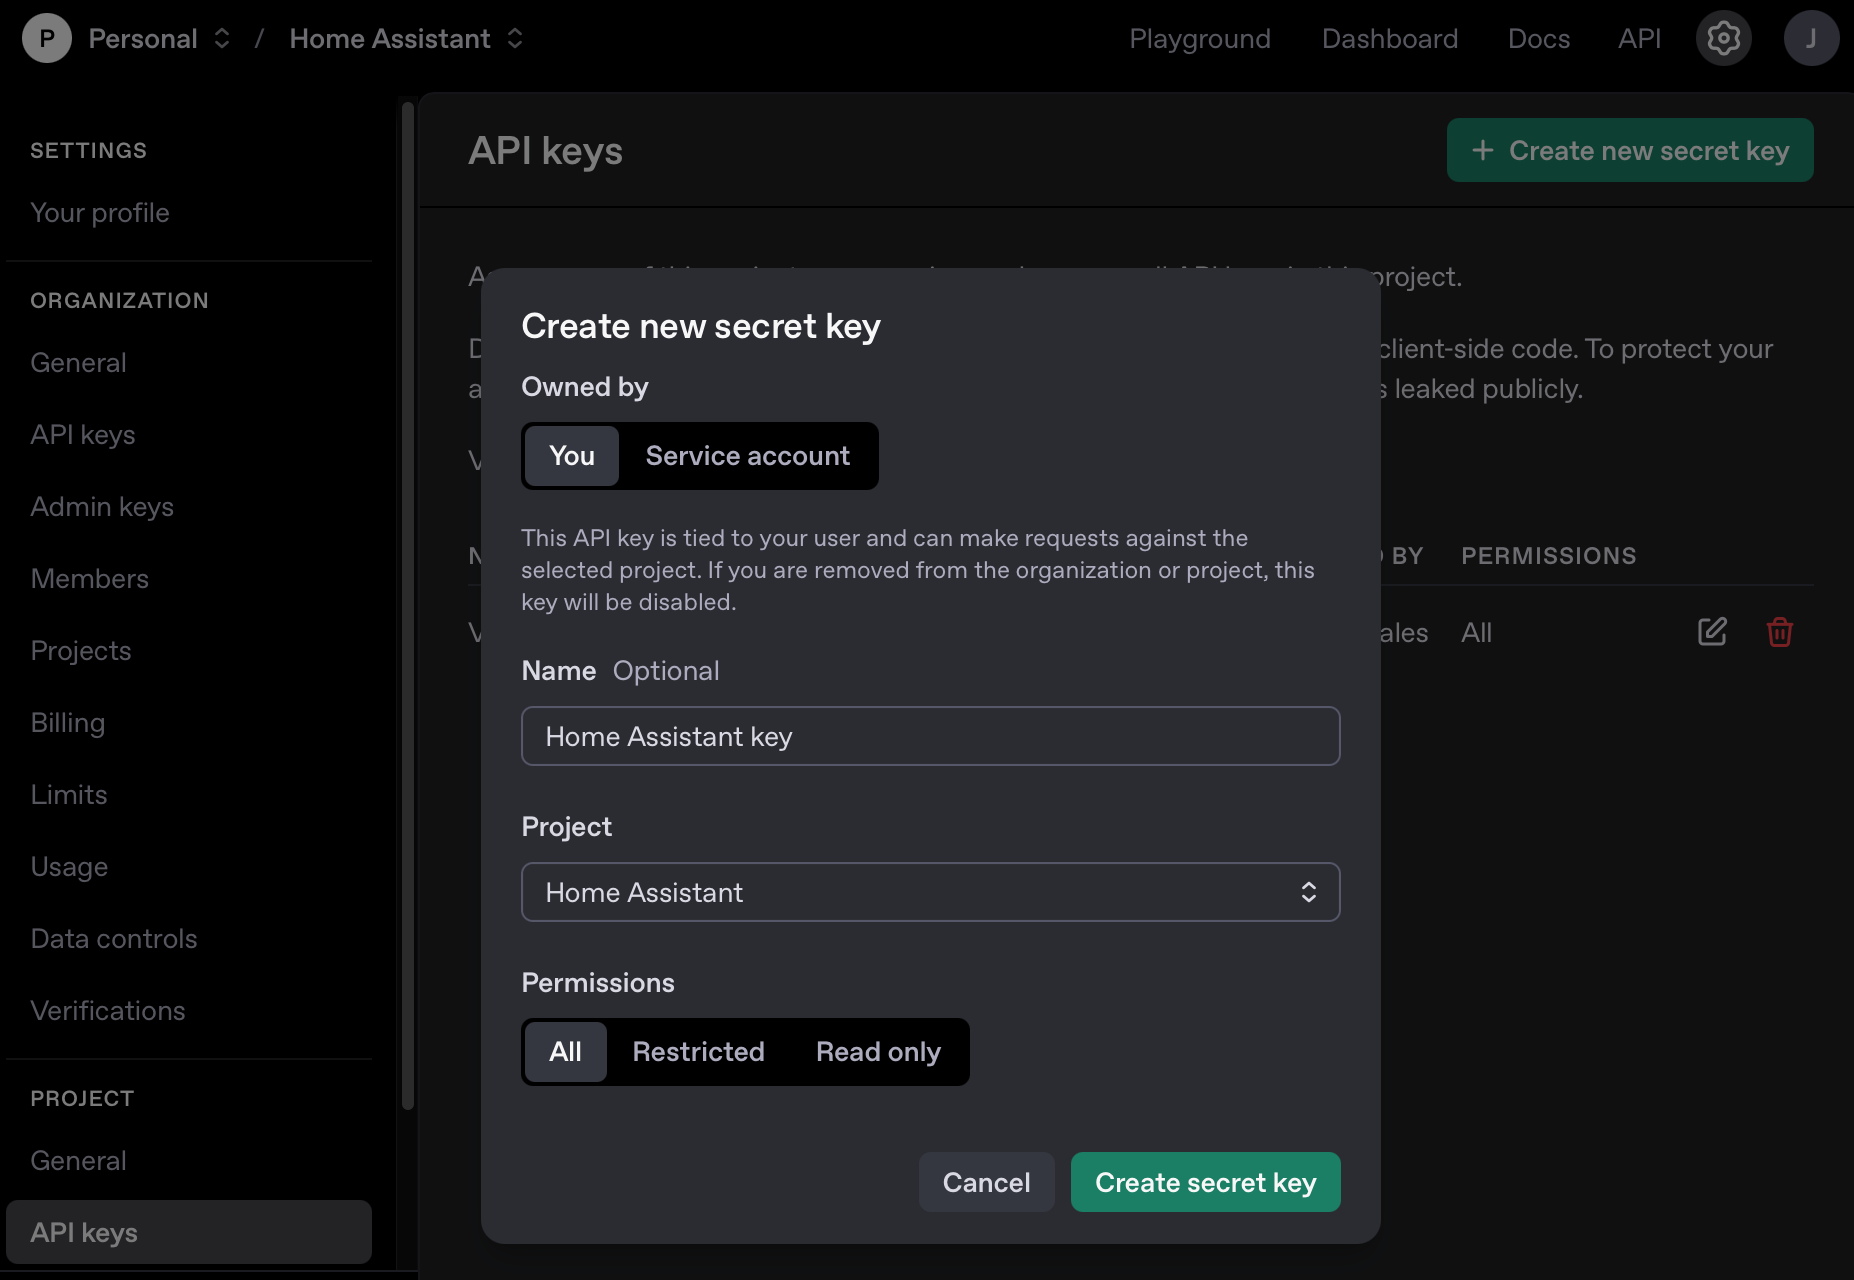
Creating an API key
To integrate OpenAI with Home Assistant, you’ll need to generate an API key. Start by navigating to the API Keys page and clicking Create new secret key. Give your key a Name, then click Create secret key.
On the next screen, your newly generated API key will be displayed. This is the only time you’ll be able to view the key, so be sure to copy and save it securely. You’ll need this key when setting up the OpenAI integration in Home Assistant.
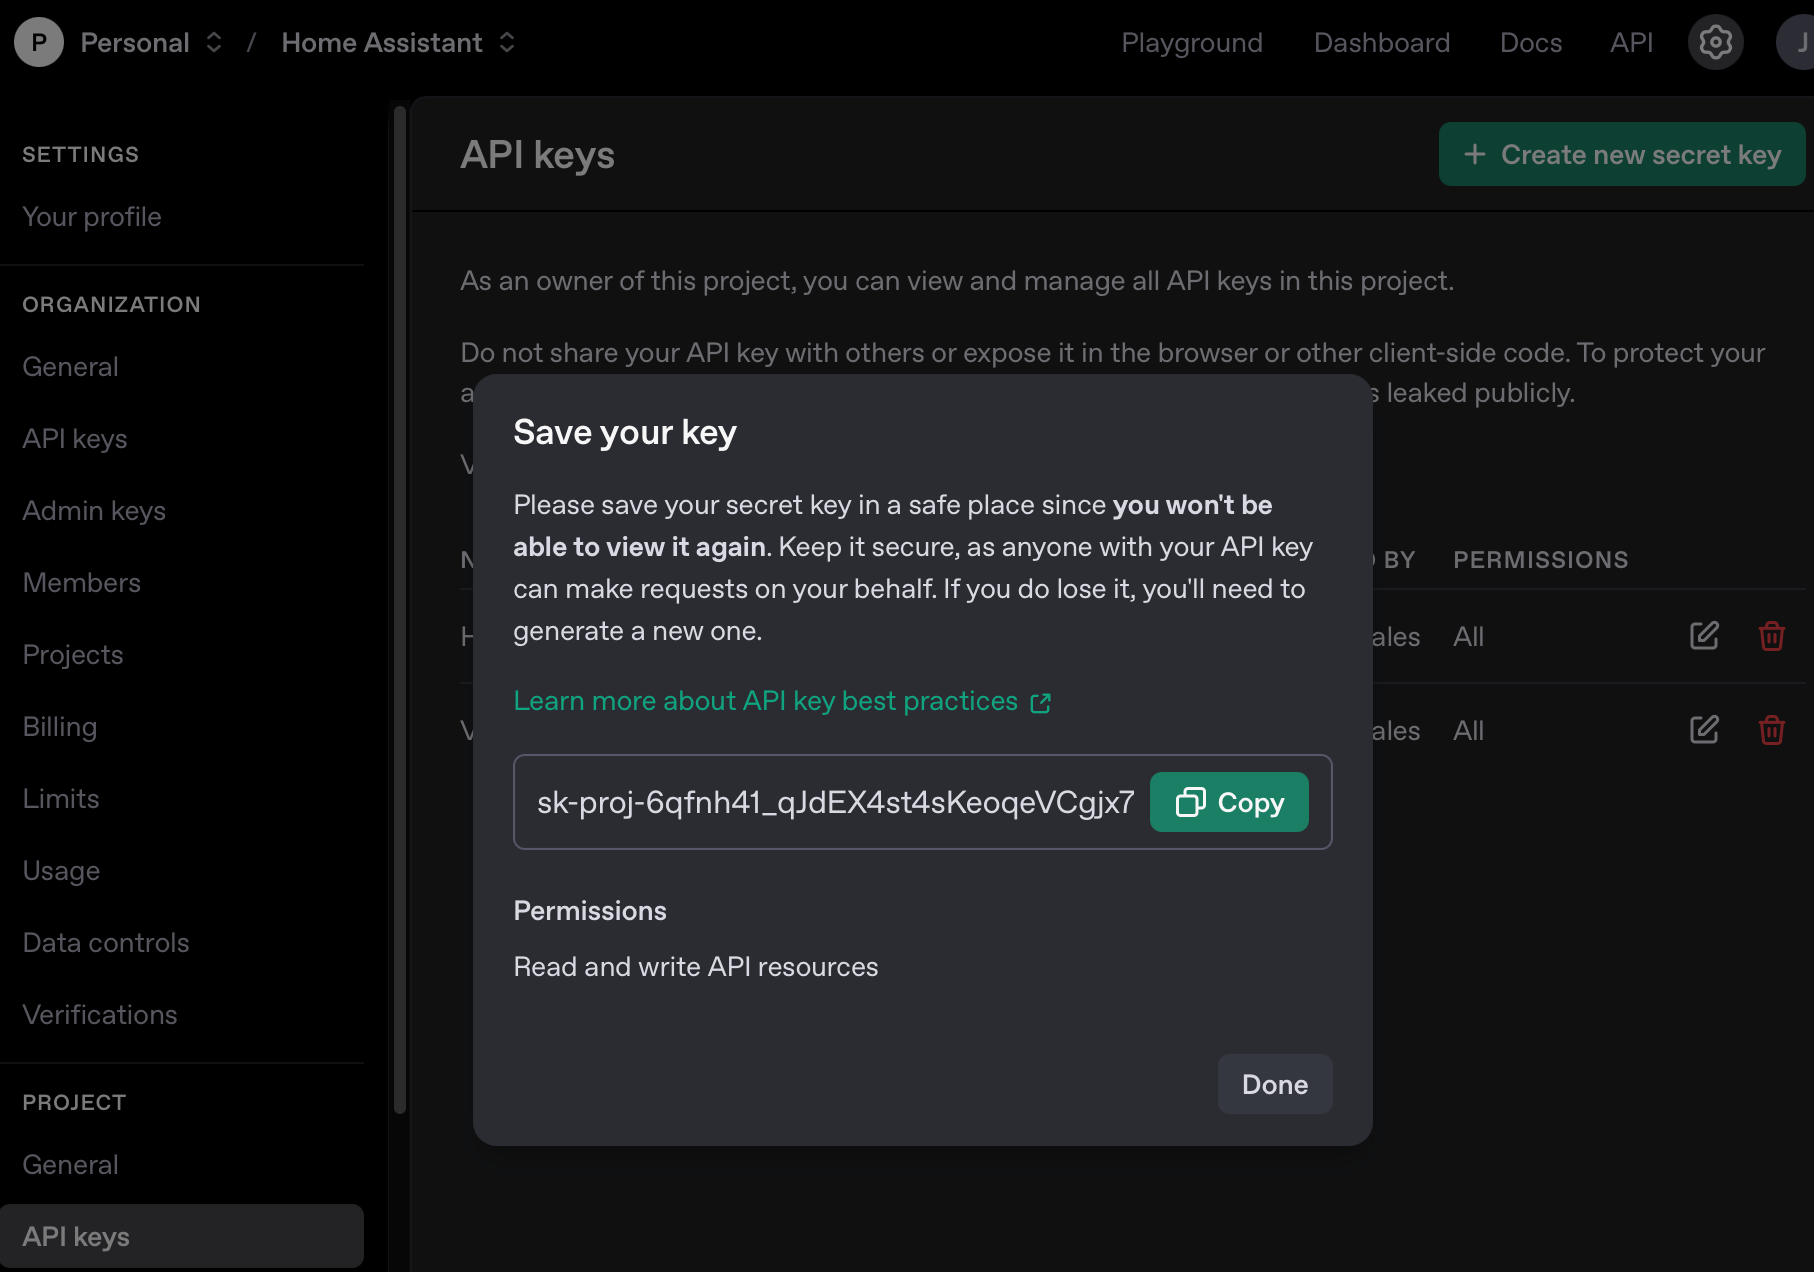
Once you’ve copied the key, click Done, and you’re ready to move on to configuring the integration in Home Assistant.
Setting up the OpenAI Conversation integration in Home Assistant
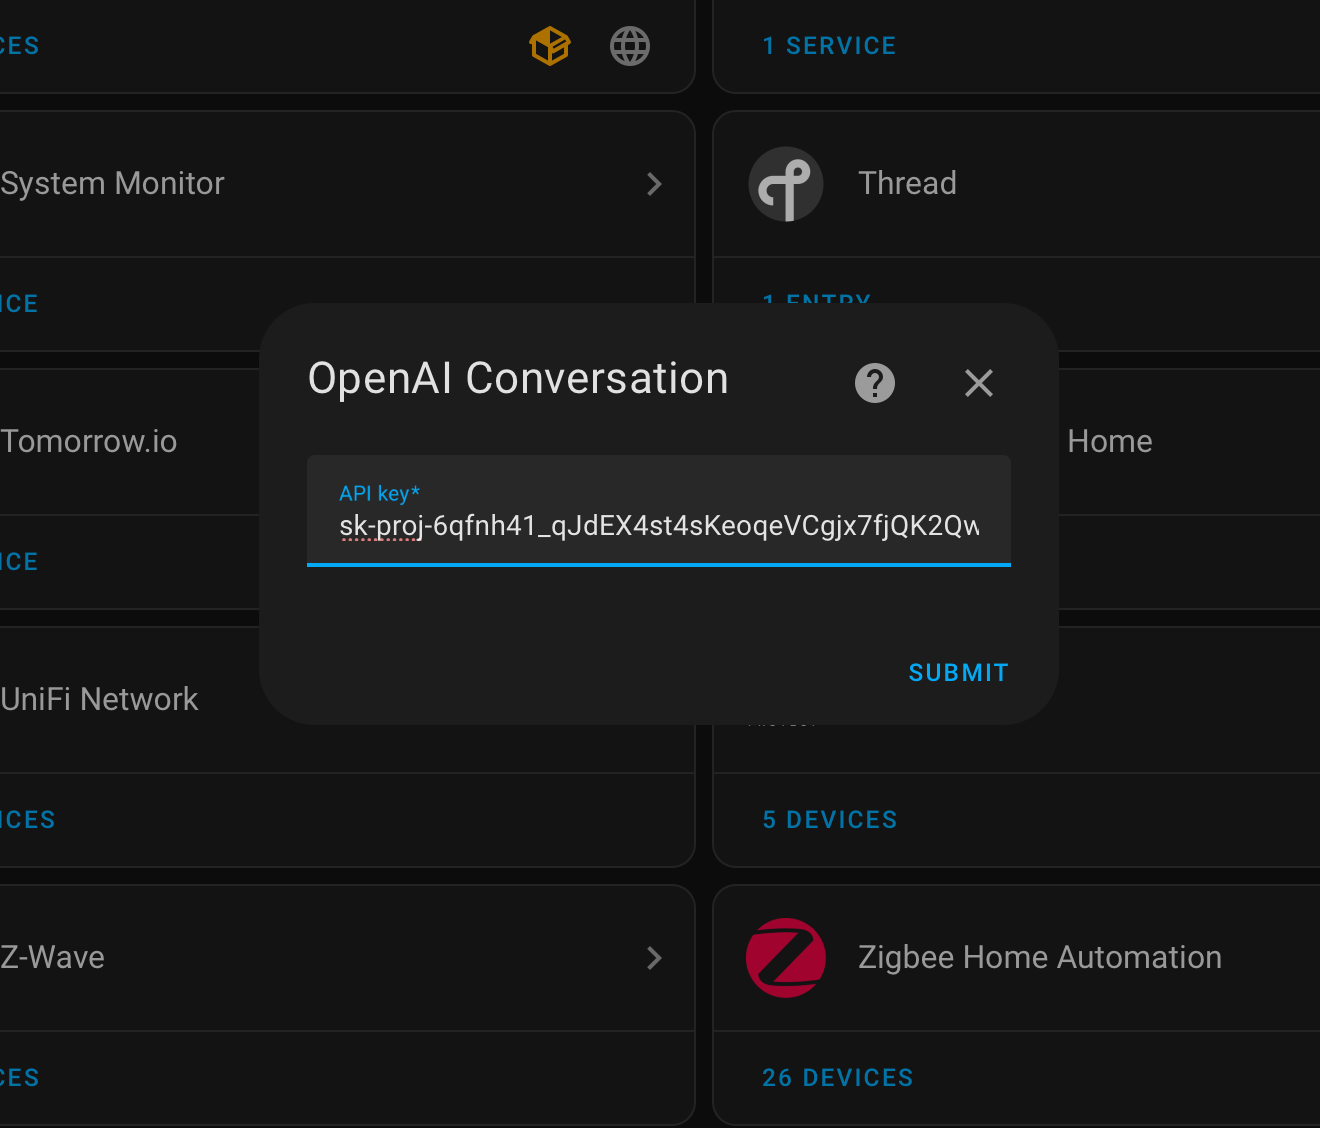
To integrate OpenAI with Home Assistant, open your Home Assistant instance and navigate to Settings > Devices & Services. Click on Add Integration, search for OpenAI Conversation, and select it. A popup will appear prompting you to enter your OpenAI API key. After entering the key, click Submit, then Finish to complete the setup.
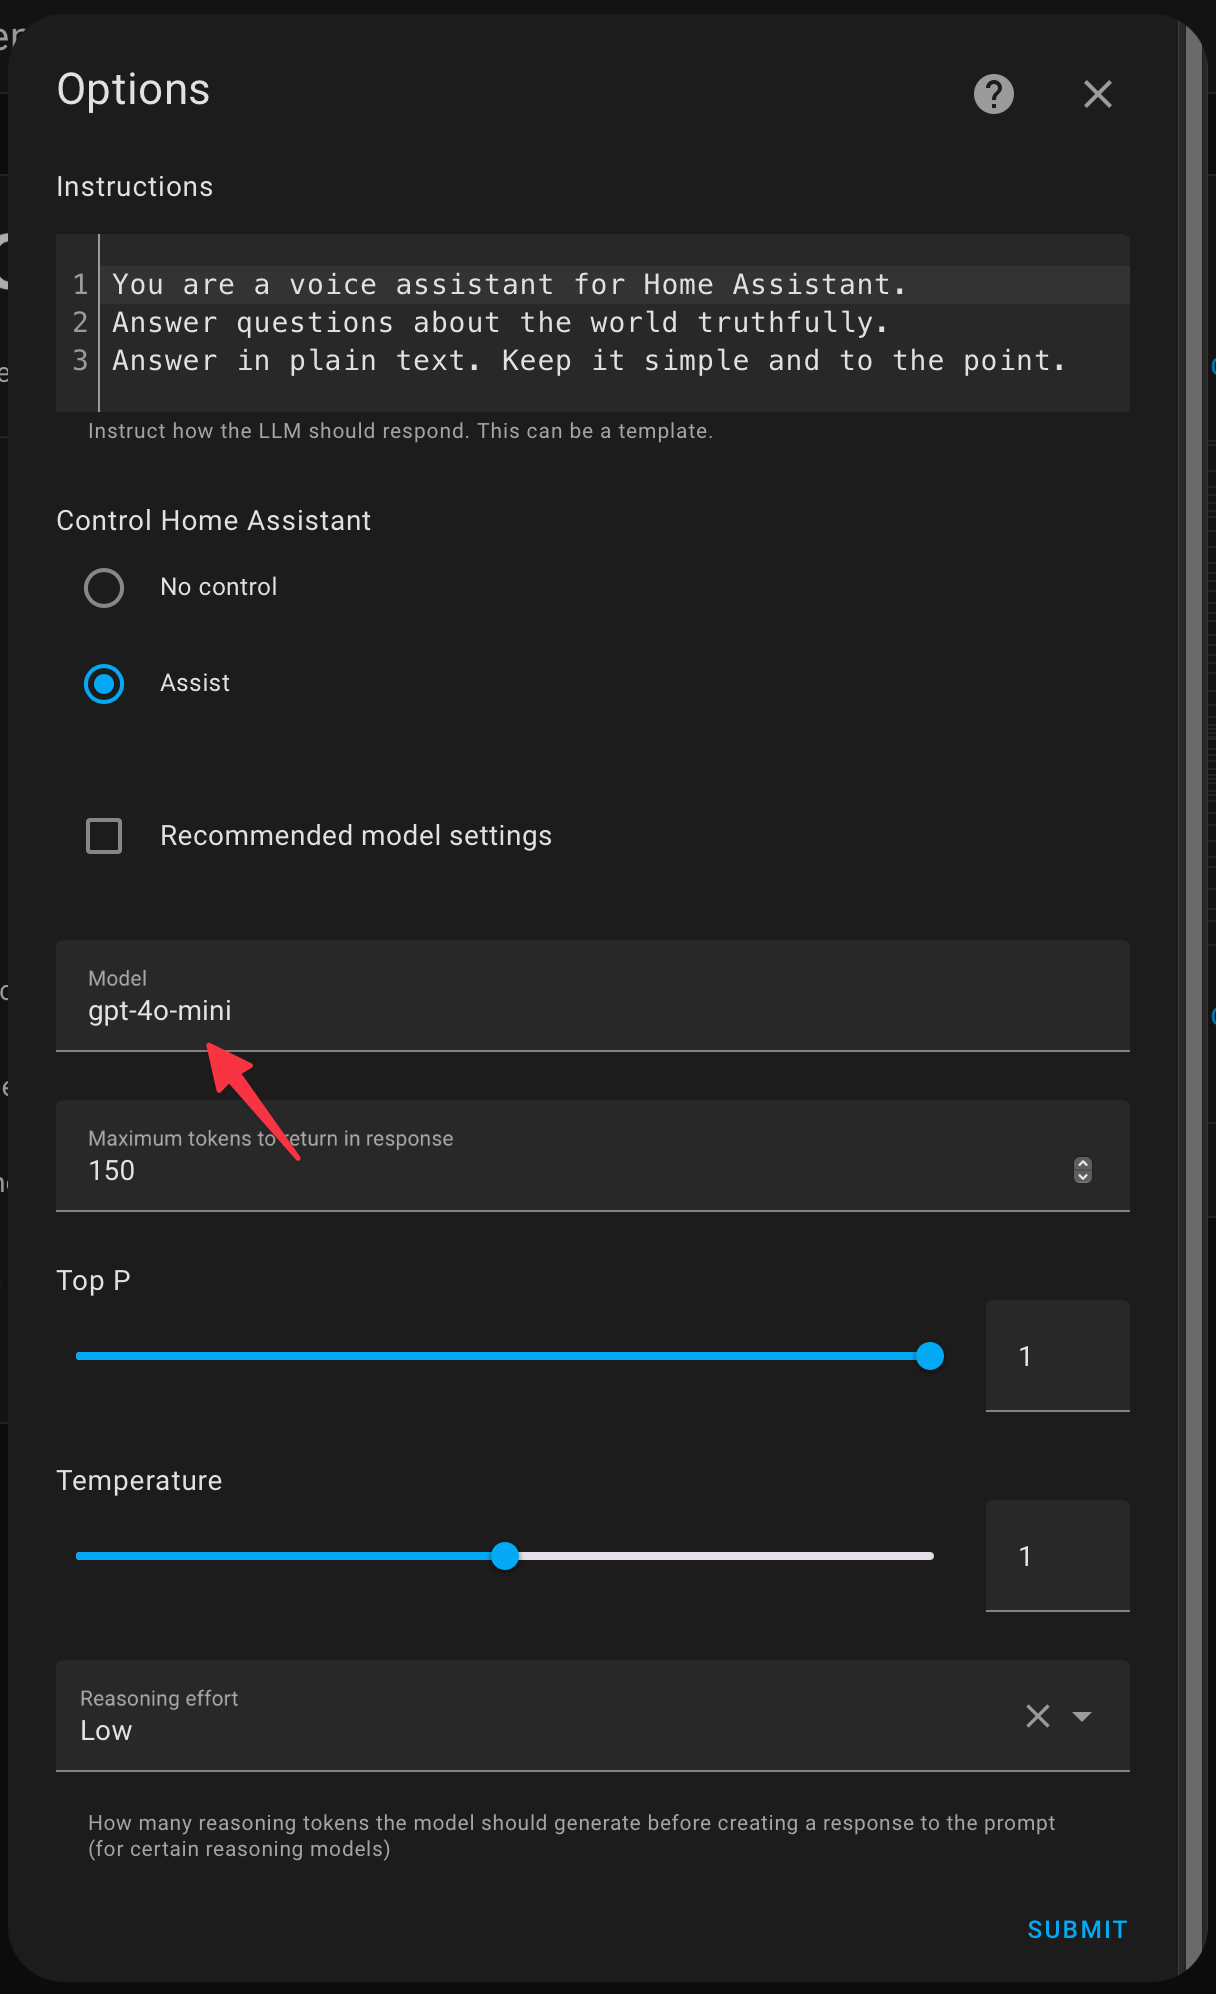
By default, the integration is configured to use the gpt-4o-mini language model. If you prefer a different model, open the integration settings, click Configure, uncheck Recommended model settings, and then click Submit. The popup window will then expand exposing additional settings. To change the language model, there is no dropdown available with a list of models to select a specific one. So, you will need to type the name for the model you would like to use. You can find details on the available OpenAI language models here
.
Setting up ChatGPT agent with Assist
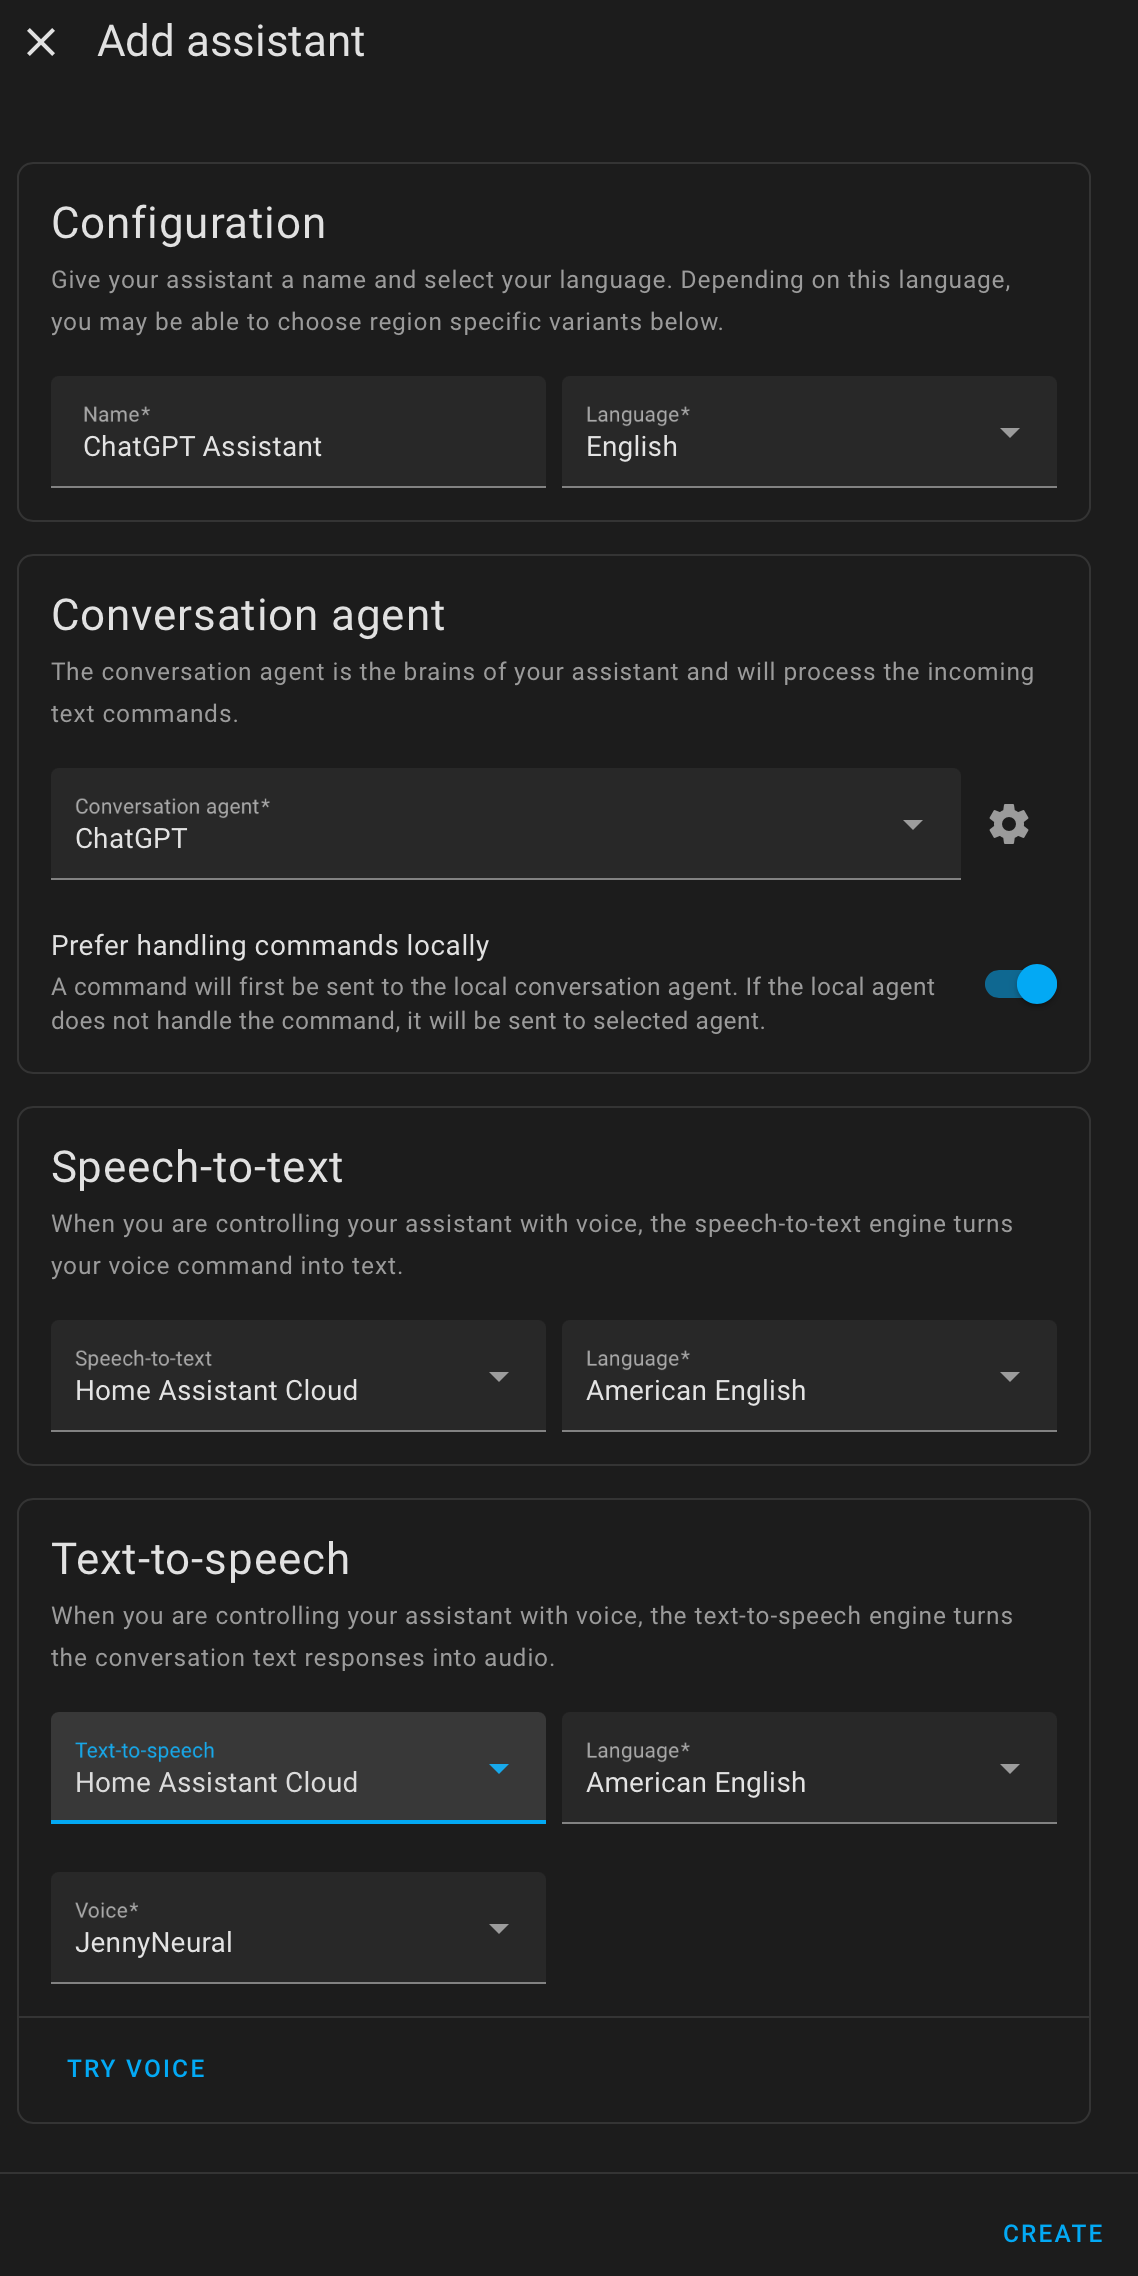
To start using ChatGPT with Home Assistant, you will need to create a new Assistant Agent to use the OpenAI integration. In Home Assistant, go to Settings > Voice Assistants and click on Add Assistant.
Under Configuration, enter a name for your Assistant. Then under Conversation Agent, select ChatGPT. The option Prefer handling commands locally, which is enabled by default, keep it enabled. This ensures that commands are first processed locally whenever possible, reducing the number of API requests to OpenAI and helping to keep costs low.
For the Speech-to-text and Text-to-speech options, if you have a Home Assistant Cloud
subscription, select Home Assistant Cloud for both of them for faster processing. However, if you’ve set up a local voice pipeline with the Home Assistant Voice PE, then select Whisper for Speech-to-Text and Piper for Text-to-Speech.
Once everything is configured, click on Create.
Setting up ChatGPT as the Assistant for the Home Assistant Voice PE
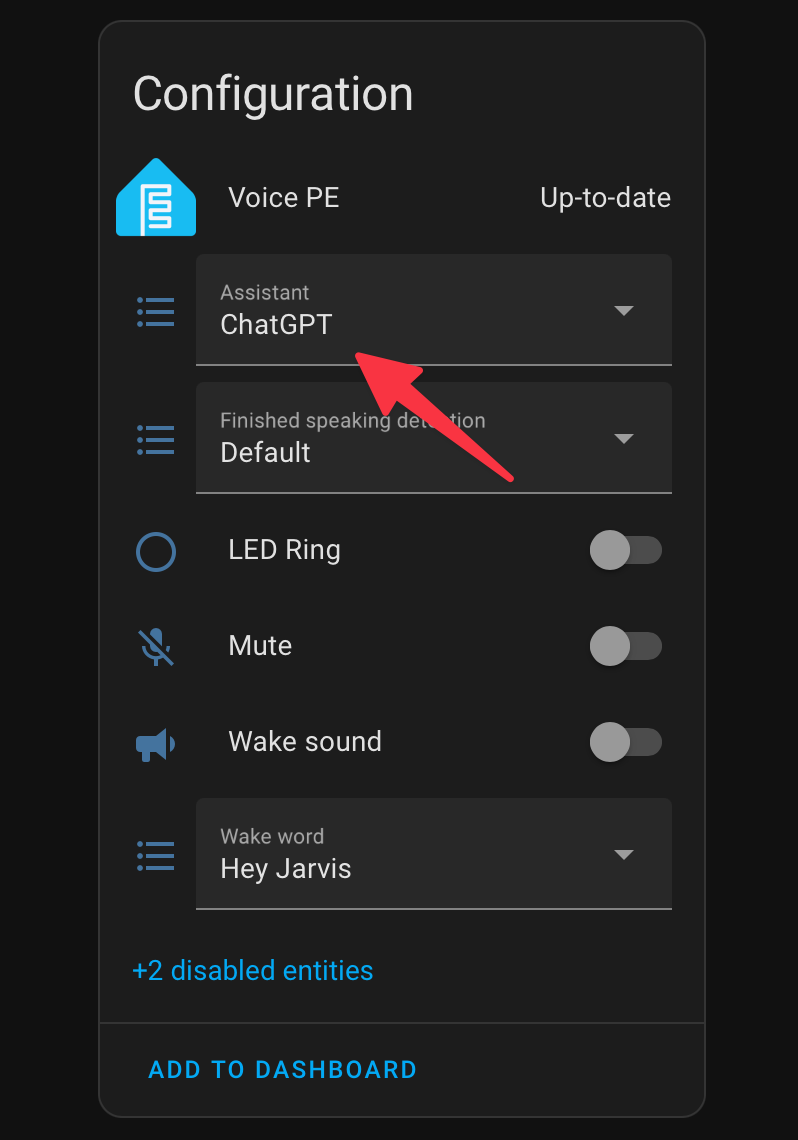
To start using the ChatGPT assistant with your Home Assistant Voice PE, Navigate to Settings > Devices & Services and under ESPHome, click on Devices. Then, select your Home Assistant Voice PE, scroll down to Configuration and under Assistant, select ChatGPT. Once selected, your Home Assistant Voice PE will now use ChatGPT as its voice assistant.
Automation to switch between local assistant and ChatGPT
By default, when enabling the ChatGPT assistant, the Prefer handling commands locally option is turned on. This means the assistant will attempt to process commands locally before sending them to ChatGPT. However, in my experience, some commands that should have been handled locally were still sent to ChatGPT multiple times, leading to unnecessary API requests and potential extra costs.
To prevent this, I created the automation below that allows me to manually switch to ChatGPT when needed. With this setup, the Home Assistant Voice PE will default to using the local voice pipeline. But if you want to send a command to ChatGPT, you can simply say: “Let me talk to ChatGPT.”
Once triggered, the automation will switch the assistant to ChatGPT, allowing you to interact with it freely. Then, after one minute, it will automatically revert back to the local voice pipeline to minimize unnecessary API usage.
alias: Switch Voice PE Assistant to ChatGPT temporarily
description: ""
triggers:
  - trigger: conversation
    command: Let me talk to ChatGPT
conditions: []
actions:
  - action: select.select_option
    metadata: {}
    data:
      option: ChatGPT
    target:
      entity_id: select.voice_pe_assistant
  - action: assist_satellite.announce
    metadata: {}
    data:
      message: ChatGPT has been enabled
    target:
      entity_id: assist_satellite.voice_pe_assist_satellite
  - delay:
      hours: 0
      minutes: 1
      seconds: 0
      milliseconds: 0
  - action: select.select_option
    metadata: {}
    data:
      option: preferred
    target:
      entity_id: select.voice_pe_assistant
mode: single
Support
As a solo creator, I dedicate my free time to maintaining this site. If you find my content useful, consider supporting the blog—every contribution helps keep the content coming.
Buy me a coffee